
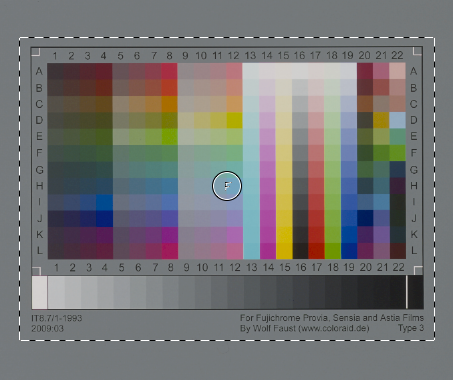
The IT8 colour chart is an international standard designed to communicate and control colours. An IT8 target is the media (film, paper) that the chart is produced on in which a profile is created from. The idea in this step is to capture the best exposure of your IT8 target to ensure accurate reproduction of colours from your scans.
1. Connect and turn on your scanner
2. Open Vuescan, and change the following settings:
Input Tab:
• Set Task to Scan to File
• Set Source to the scanner you are using
• Set Mode to Transparency
• Set Media to Slide Film
• Set Resolution to at least 2000dpi
Filter Tab: (if your scanner supports this function)
• Infrared Cleaning: Light
Color Tab:
• Color Balance: None
• Curve Low: 0.25
• Curve High: 0.75
• Set all Brightness values to 1
• Slide Vendor: Generic
• Slide Brand: Color
• Slide Type: Slide
• Scanner Color Space: Built-in
• Printer Color Space: ProPhoto RGB
• Film Color Space: Built-in
• Output Color Space: ProPhoto RGB
Output Tab:
• Select Raw File
• Raw File Name: Reference the film you are scanning followed by a unique identifier (number or letters)
• Raw Size Reduction: 1
• Raw File Type: 48 bit (or 24 bit, depending on your scanner)
• Raw Output With: Save
• Raw Save Film: Not Selected
• Raw Compression: Off
• Raw DNG Format: Not Selected
3. Scanning your IT8 film target
• Click Preview to capture an initial view of your IT8 target
• Make a Selection around the IT8 target, leaving a little bit of grey around it.
• At the bottom of the Input Tab select Lock Exposure
• Write down the RGB Exposure value – you will need to reference this value later in the process
• Click Scan to create your IT8 film target scan
Reference Screen Shots


Notes:
• Vuescan’s RAW file format is not the same as your camera RAW files (CR2, NEF, RAF). Vuescan’s RAW is essentially a TIF file with additional data enabling you to re-process the file in Vuescan without re-scanning your film. As a TIF file, Vuescan’s RAW format does not afford you the same adjustments – exposure, white-balance, tone, sharpening, etc. – as a camera RAW file would. This applies to Vuescan’s DNG file format as well.
• Setting the curve values to 0.25 and 0.75, respectfully, creates a straight curve.
• Adjusting the curve values will directly affect your scans, and can be used to adjust low/high detail. Decreasing your low value will increase shadow detail. Increasing your high value will increase your highlight detail. This is a hardware adjustment, and results will rely on your particular scanner.